

Nails
Cat Eye Nails: The Ultimate Guide to Magnetic Nail Art
Jan
Cat eye nails are one of the most eye-catching manicure trends because they combine depth, shimmer, and a “moving” light effect that changes with every angle. The signature look comes from magnetic pigments that form a reflective line or glowing halo, creating a dimensional finish that feels luxurious yet totally wearable. This guide explains cat eye nails from the ground up: what they are, how the effect works, which shapes and colours flatter different hands, how to prep and apply for maximum longevity, how to troubleshoot common mistakes, and how to create modern cat eye nail designs that look professional. Throughout the article you’ll also find practical inspiration that naturally fits Claresa-style colour palettes and salon-quality routines, so you can build a cohesive look across base, colour, and top coats while keeping the magnetic effect crisp and intense.
What Are Cat Eye Nails?
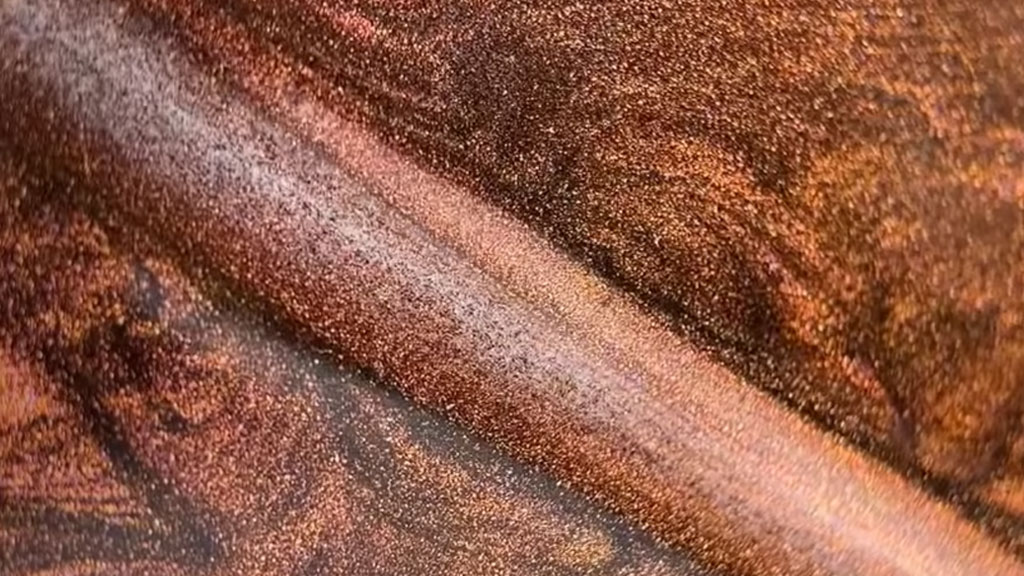
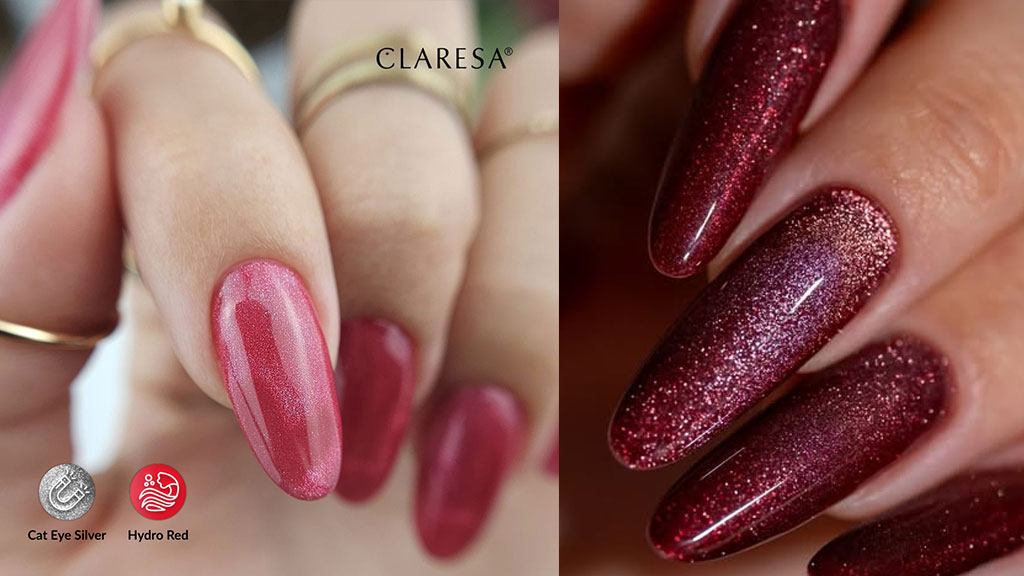
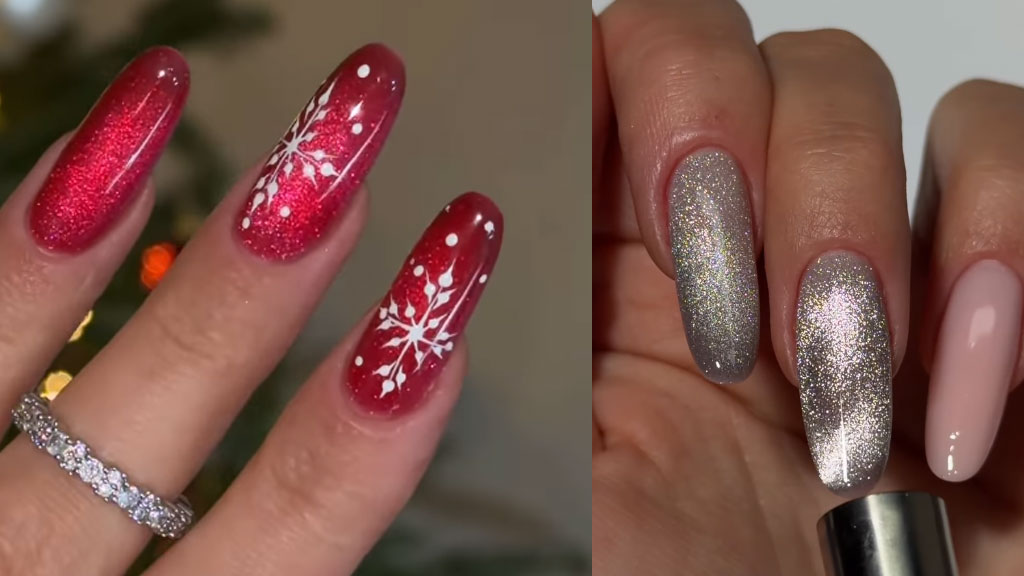
Cat eye nails are a magnetic nail art finish designed to mimic the luminous slit-like reflection you see in a cat’s eye. Unlike glitter gel nail polish that sparkles evenly across the nail, cat eye nails create a focused band or concentrated glow that looks like it floats above the colour. This “light beam” can be placed diagonally, vertically, or curved into a halo, and it can be layered to produce depth that resembles velvet, gemstones, or a galaxy-like shimmer. The effect is popular in gel polish manicures because it’s formulas can hold the magnetic particles in place while curing, giving a clean, high-definition line that stays stable for weeks when applied correctly.


How the Cat Eye Effect Works (Magnetic Science, Simply Explained)
The cat eye effect comes from tiny metallic particles suspended in the gel nail polish. When you bring a strong magnet close to the wet layer, those particles shift and gather into a pattern that follows the magnetic field. Because the particles are reflective, the gathered line becomes brighter than the surrounding area. Once you cure the gel nail polish, the particles lock into place, preserving the pattern. This is why timing matters: you shape the shimmer while the layer is wet, then cure immediately to “freeze” the design. The stronger the magnet and the better the pigment dispersion, the sharper and more dramatic the cat eye nails result will be.

Why Cat Eye Nails Are So Popular
Cat eye nails deliver a high-impact look without requiring advanced nail art skills like hand-painted detailing. With the right magnet technique, you can get a salon-level finish in minutes, and the manicure looks different under daylight, indoor lighting, and flash photography. Another reason cat eye nails are trending is versatility: the same product can produce multiple finishes, from a minimal vertical stripe on nude tones to a bold diagonal glow on deep jewel shades. Cat eye nails also pair beautifully with modern nail shapes and minimal accessories, so you can keep the look sleek while still getting that dramatic, dimensional shine.
Tools and Products You Need for Cat Eye Nails
To create clean, long-lasting cat eye nails, you need a strong magnet, a compatible cat eye gel nail polish, and a base and top coat suited to your system. A UV/LED lamp is essential for gel cat eye nails, because you want to cure immediately after shaping the shimmer. You’ll also benefit from standard manicure essentials like a nail buffer, a file that matches your preferred shape, a cuticle pusher, and a dehydrator and primer if you struggle with lifting. If you’re building a Claresa-inspired routine, look for a cohesive set of base, colour, and top products that are designed to work together so the layers bond well and the finish stays glossy and smooth.
Nail Prep for Long-Lasting Cat Eye Nails
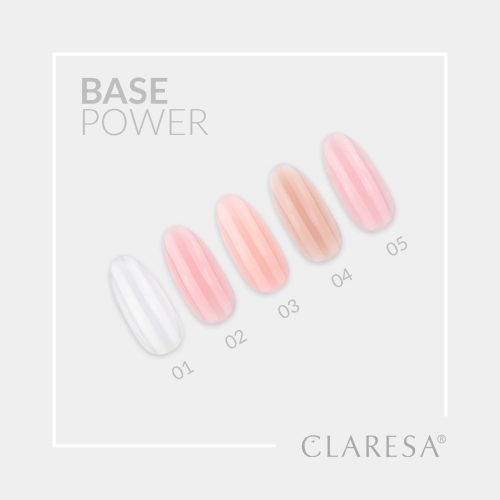
Proper prep is the difference between cat eye nails that last two days and cat eye nails that look flawless for weeks. Start by shaping the free edge, because filing after application can chip the finish. Gently push back cuticles and remove invisible cuticle residue from the nail plate, since product on cuticle tissue is a common cause of lifting. Lightly buff the surface to remove shine without thinning the nail. Then cleanse and dehydrate to remove oils, and apply primer if your nails are flexible or prone to peeling. When you apply base coat, keep it thin and controlled, cap the free edge, and cure fully, because a solid foundation makes the magnetic effect look smoother and prevents dents and uneven texture.
How to Do Cat Eye Nails Step by Step (Beginner to Pro)
- Step 1: Apply Base Coat Correctly
Apply a thin base coat and cure according to your lamp’s recommended time. Thin layers are crucial for cat eye nails because thick product can shift and flood the cuticles, making the final look messy and shortening wear time. Capping the free edge helps prevent chipping, especially on longer nails or if you type a lot. - Step 2: Apply the Cat Eye Layer Evenly
Apply a thin-to-medium layer of cat eye gel nail polish. You want enough product for the particles to move freely, but not so much that the layer becomes thick and wavy. Work one nail at a time if you’re a beginner, because the magnet effect is easiest to control while the gel polish is fresh and wet. - Step 3: Use the Magnet to Shape the Effect
Hold the magnet close to the nail without touching the wet gel. The closer the magnet, the stronger the pull and the sharper the line. Keep your hand steady, and watch the shimmer gather. Once you see the desired stripe or halo, cure immediately to lock it in place. - Step 4: Seal With Top Coat for a Glass Finish
Apply a quality top coat to protect the design and enhance the depth. A glossy finish amplifies the illusion of a floating beam of light, while a velvet or satin top can create a softer, trend-forward look. Cure fully and wipe the sticky layer if your top coat requires it. Your cat eye nails should now look smooth, dimensional, and intensely reflective.


Best Magnet Techniques: Line, Halo, Velvet, and 3D Depth
- The Classic Cat Eye Line
The classic cat eye nails look is a bright line running through the center or diagonally across the nail. To achieve it, position the long side of the magnet parallel to the line you want to create. A diagonal line often flatters the nail shape because it elongates the finger and makes the shimmer look more dynamic. - The Halo or “Cat Eye Bloom” Effect
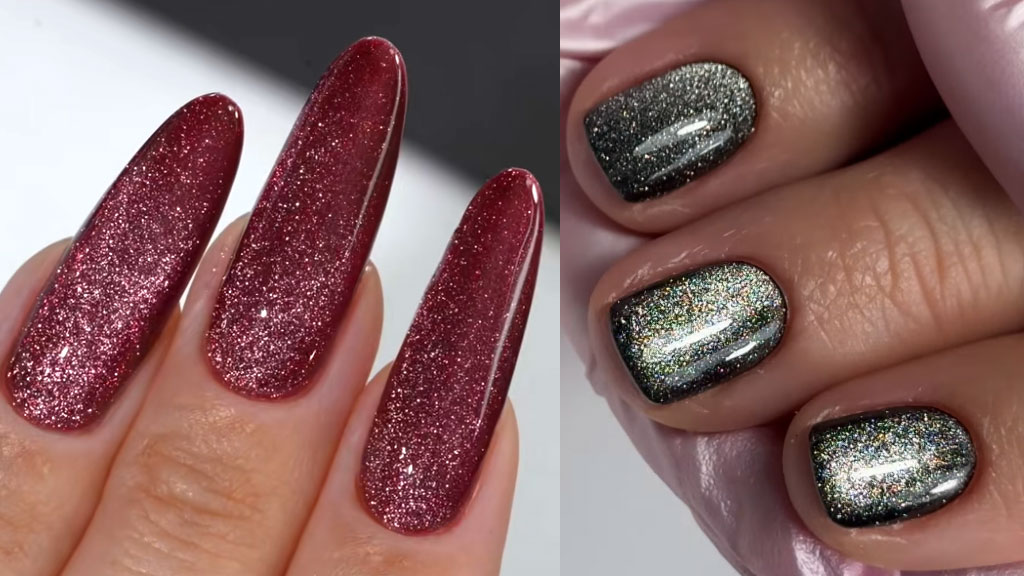
The halo technique forms a glowing oval or circular highlight that resembles a gemstone reflection. To get this style, hold the magnet above the center of the nail and slightly tilt it, then adjust the position to coax the particles into a concentrated glow. Halo cat eye nails look especially luxurious in jewel tones like emerald, sapphire, and amethyst-inspired shades. - The Velvet Cat Eye Nails Finish
Velvet cat eye nails create an all-over soft sheen that looks like brushed fabric. This effect is typically achieved with a magnet designed for velvet patterns or by using multiple magnet positions quickly to distribute the shimmer evenly. Velvet finishes are ideal when you want a refined manicure that still looks expensive and dimensional without a single sharp stripe. - Layered 3D Depth for a “Galaxy” Look
For extra depth, you can layer cat eye gel over a complementary colour and use different magnet angles on each layer. One layer can create a diagonal stripe, while another adds a subtle halo, producing a multi-dimensional look that shifts as you move. This technique is perfect for creative, Claresa-inspired colour stories where the base shade and shimmer tone are designed to harmonize.
Best Nail Shapes and Lengths for Cat Eye Nails
Cat eye nails work on any length, but the effect looks different depending on shape. Almond and oval nails naturally elongate the cat eye stripe and make the shimmer look sleek and elegant. Square and squoval nails give a modern, graphic feel, especially with a straight vertical line. Coffin and ballerina shapes look striking with diagonal stripes and layered depth, while short natural nails look best with a subtle halo or a thin line that doesn’t overwhelm the nail plate. If you want the magnetic effect to look more dramatic, choose a slightly longer length and a shape that provides enough surface area for the highlight to spread and shift.
Common Mistakes and How to Fix Them
- Problem: The Cat Eye Line Looks Fuzzy
A fuzzy line usually means the magnet is too far from the nail or the gel layer is too thick. Bring the magnet closer, keep it steady, and apply a thinner cat eye layer. Cure immediately once the highlight forms, because waiting even a few seconds can let particles drift and blur. - Problem: The Effect Disappears After Top Coat
This often happens when the cat eye layer wasn’t fully set before top coat application, or when the top coat is applied with heavy pressure that disturbs the particles. Cure the cat eye layer properly, then float the top coat gently without pressing the brush into the surface. A smooth, controlled top coat application preserves definition and keeps cat eye nails crisp. - Problem: Lifting or Chipping After a Few Days
Wear issues are usually caused by poor prep, product touching cuticles, or not capping the free edge. Make sure you remove cuticle residue, dehydrate properly, keep product off skin, and cap each layer. If you work with water frequently, consider a more durable base coat approach and avoid using nails as tools, because cat eye nails are strongest when the structure and seal are intact. - Problem: Streaky or Patchy Coverage
Patchy coverage can come from uneven application or insufficient mixing of the magnetic pigment. Roll the bottle gently between your hands before use, apply a smooth layer, and work one nail at a time. Consistent, even layers produce cleaner cat eye nails with a more uniform glow.
How to Make Cat Eye Nails Last Longer
Longevity is a combination of preparation, thin controlled layers, proper curing, and protective finishing. Always remove shine and oils before you start, keep product away from the cuticle line, and cap the free edge on every layer. Cure each coat fully, and use a reliable top coat that resists scratching because surface micro-scratches can dull the magnetic depth over time. If you want cat eye nails to stay glossy, avoid harsh detergents without gloves, apply cuticle oil daily, and consider reapplying a thin layer of top coat after a week if your lifestyle is tough on manicures.
Removal, Aftercare, and Nail Health
Proper removal protects nail health and keeps your nails strong for your next cat eye nails set. If you used gel, file the top coat gently to break the seal, then soak with acetone-based remover until the product softens and lifts. Avoid forcefully scraping, because aggressive removal can thin the nail plate and lead to peeling. After removal, wash hands, apply cuticle oil, and use a nourishing hand cream. If you frequently wear gel manicures, consider short breaks or strengthening routines, especially if your nails are naturally soft or flexible. Healthy nails provide a smoother canvas for cat eye nails and help your manicure last longer.


FAQs About Cat Eye Nails
- Are cat eye nails hard to do at home?
Cat eye nails are easier than they look because the magnet creates the design for you. The key is controlling the thickness of the magnetic layer and curing immediately after the highlight forms. With a little practice, most people can achieve a clean line and a smooth, glossy finish at home. - Do I need a special lamp for cat eye gel nail polish?
Yes, if you are using gel nail polish, you need a UV/LED lamp compatible with your products. Proper curing is essential to lock the magnetic pattern in place and ensure long wear without dents, lifting, or dullness. - Can cat eye nails be done on short nails?
Absolutely. On short nails, a subtle halo or a thin vertical line often looks best because it enhances the nail shape without overwhelming the surface. Short cat eye nails can look clean, modern, and sophisticated. - How long do cat eye nails last?
With proper prep and quality products, gel cat eye nails commonly last around two to three weeks. Longevity depends on nail condition, application technique, and daily wear habits, but controlled layers and good sealing make a big difference. - Why do my cat eye nails look dull after a few days?
Dullness usually comes from surface scratches or a top coat that isn’t resistant enough for your lifestyle. Using gloves for cleaning, applying cuticle oil daily, and choosing a durable top coat can keep cat eye nails glossy and vibrant.
Summary: The Cat Eye Nails Checklist
Cat eye nails are a magnetic manicure style that creates a luminous line or halo with impressive depth and movement. For the best results, start with careful nail prep, apply the magnetic layer smoothly, and use a strong magnet close to the nail to form a crisp highlight. Cure immediately to lock the effect, then seal with a quality top coat for a glass finish. If you build your routine around cohesive, salon-grade products in a Claresa-inspired palette, you can create cat eye nails that look professional, last for weeks, and deliver the dimensional shine that makes this style so addictive.