


Nail Preparation & Care Guides
Why Is My Gel Polish Peeling or Lifting? 10 Causes and How to Fix Them
Oct
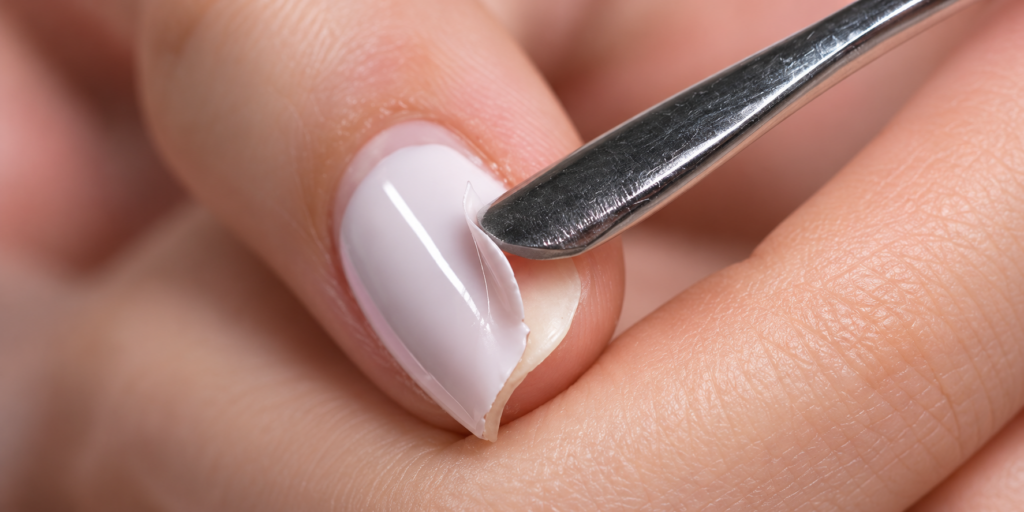
Why is my gel polish peeling or lifting after just a few days? The most common reasons are poor nail preparation, oil or residue on the nail plate, gel touching the skin, an unsuitable base coat, thick application layers or incomplete curing. Sometimes the problem is not the gel polish itself but the condition of the natural nails or the pressure placed on the manicure during everyday activities.
The quickest way to identify the cause is to look at where the gel starts separating and how soon it happens. Lifting near the cuticle usually points towards preparation or application around the nail fold. Peeling from the free edge suggests a different set of possible problems, including mechanical wear, nail flexibility or inadequate edge coverage.
A gel manicure should not routinely peel away in large pieces after one or two days. When it does, repeatedly applying more top coat is unlikely to solve the underlying problem. The correct approach is to identify the failed layer, review the application process and select products that suit the natural nails.
Gel Polish Peeling vs Lifting vs Chipping: What’s the Difference?
Although these terms are often used interchangeably, they describe different types of manicure failure.
- Gel polish peeling: Part of the cured coating separates in a sheet or flexible piece, sometimes taking several layers with it.
- Gel polish lifting: An edge of the product detaches from the natural nail or an underlying enhancement, creating a visible gap.
- Gel polish chipping: Small sections break away, most commonly around the free edge or corners.
- Gel polish cracking: The cured coating develops a fracture, sometimes because of pressure, impact or differences in flexibility between the nail and product.
- Natural nail peeling: Thin layers of the natural nail plate separate. This is a nail condition rather than simply a problem with the gel coating.
These distinctions matter because the solution for a lifting base coat is not necessarily the same as the solution for a cracked top coat or damaged natural nails.
Why Is My Gel Polish Lifting? Identify the Cause by Location
The position of the lifting provides a useful starting point for troubleshooting, although it cannot establish the exact cause on its own.
| What you notice | Possible causes | What to check first |
|---|---|---|
| Gel lifting at the cuticle | Residual cuticle tissue, product touching skin, oil or inadequate preparation | Cuticle-area preparation and the margin left during application |
| Gel peeling from the tips | Mechanical wear, nail flexibility, edge application or adhesion problems | Free-edge condition, product thickness and daily activities |
| Gel peeling off in one piece | Weak bonding between the base and nail, incompatible products or curing problems | Whether the base remains attached and whether the entire system was cured correctly |
| Gel lifting from the sidewalls | Product touching skin, uneven application, lateral pressure or missed preparation | Sidewall clearance and nail shape |
| Gel peeling after one day | Preparation failure, unsuitable base or incomplete curing | Application procedure, product compatibility and curing lamp |
| Colour separating from the base | Interlayer adhesion problems, incompatible products or incorrect handling | Which layer remains on the nail and the relevant product instructions |
| Only one nail keeps lifting | Local nail damage, repeated pressure or a preparation difference | That nail’s condition and how it is used |
| Several nails lift at the same time | A problem affecting the complete manicure system | Shared preparation, base coat, lamp and curing procedure |
If the natural nail itself is separating from the underlying nail bed, rather than the artificial coating separating from the nail plate, do not treat it as ordinary gel lifting. This condition needs appropriate medical assessment, particularly if there is pain, discoloration or inflammation.
10 Common Causes of Gel Polish Peeling or Lifting
1. Oil, Moisture or Residue on the Nail Plate
Gel polish depends on adequate adhesion between the natural nail and the base coat. If the surface contains oils, dust, preparation residue or excess moisture, the base may not bond as intended.
This can result in a manicure that looks perfectly normal immediately after application but begins separating within the first few days.
The natural nail should be prepared according to the chosen product system. After shaping and removing surface dust, a suitable cleansing or dehydrating product may be used where the manufacturer’s instructions call for one.
Claresa CLEANER PRO 100 ml is intended for cleaning and degreasing the nail plate. It can also be used for removing a dispersion layer when the product instructions require that step.
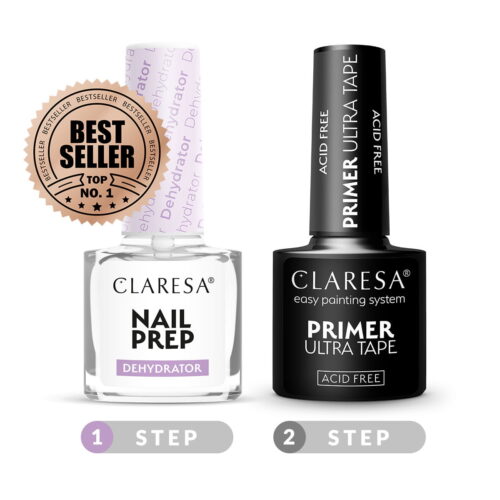
For an additional preparation stage, Claresa Nail Prep DEHYDRATOR 5 ml is designed to remove surface moisture and lipids from the nail plate before applying the base or an appropriate primer.
Apply the dehydrator to a previously prepared, dust-free nail plate and allow it to evaporate as directed. Avoid touching the cleaned nail surface with your fingers afterwards.
What to change: Review the cleansing and dehydration process before changing the entire gel polish system. More aggressive filing is not an appropriate substitute for correct surface preparation.
2. Invisible Cuticle Tissue Remains on the Nail
One of the most overlooked causes of gel lifting near the cuticle is product being applied over tissue or residue that remains attached to the nail plate.
The cuticle area can look tidy while a very thin layer of non-living cuticle tissue remains on the nail surface. If the base coat is applied over this material, part of the coating may not bond directly to the nail.
As the natural nail grows and the manicure experiences everyday movement, lifting may become visible around the proximal nail fold.
What to change: Ensure the nail plate is properly prepared while leaving the protective living skin around the nail intact. Avoid aggressive cutting, scraping or excessive abrasion.
Good preparation should remove unwanted surface residue without damaging the natural nail or surrounding tissue.
3. Gel Polish Touches the Skin or Cuticle Area
When uncured gel polish floods the cuticle area or sidewalls, it creates two problems. First, the coating may develop an unstable edge. Second, uncured gel contacting the skin can increase the risk of sensitisation and allergic reactions.
Gel applied onto the skin does not create the same intended bond as gel correctly applied to the nail plate. As the skin moves and the nail grows, that contact point may become an area where the manicure begins to lift.
Keep a small, clean margin around the nail and remove accidental contact with uncured product safely before curing, following professional application procedures.
The British Association of Dermatologists warns that skin exposure to uncured gel products and inadequate curing can contribute to allergic sensitisation.
What to change: Use controlled product amounts, keep the brush away from the skin and correct any flooding before curing. Do not deliberately cure gel polish that has spread onto the surrounding skin.
4. The Base Coat Is Unsuitable for the Nail Type
Not every natural nail behaves the same way. Some nails are relatively firm, while others are thin, flexible or prone to mechanical stress.
The base coat must provide appropriate adhesion while remaining suitable for the intended manicure system and natural nail condition.
A conventional base may be appropriate for a straightforward short-nail manicure. A more structured or flexible base may be useful for certain nail conditions, provided it is compatible with the rest of the system.
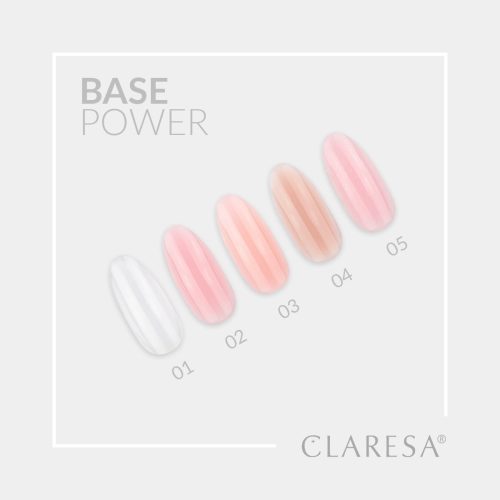
Claresa BASE 5 ml is a classic gel polish base designed to promote adhesion on the natural nail. It is suitable for conventional gel polish styling, particularly on short nails.
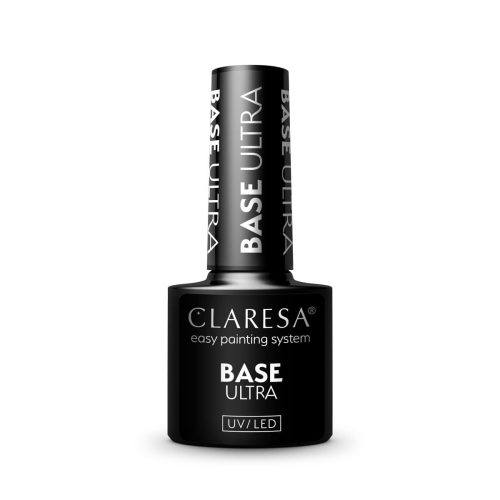
Claresa ULTRA BASE 5 ml is a thicker hardening base intended for additional structure and certain build-up applications.
The thicker or harder product is not automatically the better choice. The correct base depends on the natural nails, the intended structure and the manufacturer’s recommended application.
What to change: If lifting is persistent, review whether the base is appropriate for the nails rather than simply applying a thicker coat.


5. Primer Is Missing, Incorrectly Applied or Used Unnecessarily
A primer and a base coat perform different functions. A primer is a preparation product intended to support adhesion in systems that require it. A base coat forms part of the cured manicure structure.
Not every gel manicure requires an additional primer. Its suitability depends on the nail condition and the manufacturer’s directions.
Claresa PRIMER ACID FREE 5 ml is designed to improve adhesion between the natural nail and suitable base or gel products.
Another option is Claresa PRIMER ULTRA TAPE 5 ml. This acid-free preparation product leaves a noticeably tacky layer intended to help the following product adhere.
The sticky layer left by Primer Ultra Tape is part of its intended application. It should not be treated as a failure to dry or automatically wiped away.
Both products must be used according to their specific instructions, with care to prevent contact with the skin.
What to change: Review whether a primer is necessary and compatible with your chosen base. Do not combine multiple preparation liquids or apply excessive amounts in an attempt to compensate for poor nail preparation.
6. Gel Polish Layers Are Too Thick
Applying a thick layer of gel polish can make it harder for light to cure the product sufficiently throughout the coating.
A thick colour layer may also flow towards the cuticle and sidewalls before curing, creating additional opportunities for lifting.
This is particularly important with highly pigmented shades. Dark reds, blacks and opaque whites can require careful application because pigments affect how light passes through the product.
Two correctly applied, thin colour layers are generally preferable to one excessively thick layer when the manufacturer’s instructions specify a multi-coat application.
What to change: Apply controlled layers and follow the curing instructions for the exact product. Do not assume that adding more gel produces a stronger or more durable manicure.
7. Gel Polish Is Not Fully Cured
Incomplete curing is another important cause of premature manicure failure. It can also increase the risk of exposure to uncured ingredients.
Gel polish does not cure simply because it feels hard on the surface. The photoinitiators in the formula must receive suitable light under the conditions specified for the product.
Several factors can affect curing:
- Using a lamp that is not compatible with the product.
- Applying layers thicker than the instructions permit.
- Using an incorrect curing time.
- Positioning the fingers so that some nail surfaces receive insufficient light.
- Using damaged or poorly performing curing equipment.
- Assuming all gel products require the same lamp settings.
Lamp wattage alone does not establish curing compatibility. The wavelength output, light intensity, product formulation, recommended exposure and hand placement all matter.
A product may appear cured without having received the conditions required for proper polymerisation. Extending the curing time at random is not a reliable substitute for checking the manufacturer’s instructions and lamp compatibility.
The STYLISTIC L2 UV/LED Lamp 48W available from Claresa.ie uses dual-wavelength LED technology for compatible UV/LED nail products.
Before selecting a lamp, confirm that its specifications meet the curing requirements of the gel system you intend to use.
For more information about lamp selection, read the UV and LED Nail Lamp Guide.
What to change: Check the exact base, colour and top coat curing requirements, the lamp specifications and the thickness of every layer.
8. The Free Edge Is Exposed to Wear or Repeated Pressure
When gel polish starts separating from the tips, the problem may involve mechanical stress rather than the cuticle preparation.
The free edge experiences pressure during activities such as typing, cleaning, opening packaging and handling hard objects.
Repeated bending or impacts can contribute to cracks, chips or lifting, especially when the natural nails are relatively flexible.
Where the manicure system and nail length allow it, proper free-edge coverage can help maintain a continuous protective coating. However, simply applying more product around the edge will not correct weak adhesion or incomplete curing.
A suitable top coat helps protect the finished surface. Claresa Diamond Top No Wipe 5 ml provides a glossy, protective finish for compatible gel manicures.
What to change: Examine the nail length, application at the free edge and the activities that place pressure on the nails. Keep the finished coating smooth and avoid unnecessarily bulky tips.
9. The Natural Nail Flexes More Than the Applied Product
Some natural nails bend noticeably during everyday activities. If the cured coating and the underlying nail respond differently to that movement, stress can accumulate within the manicure.
On suitable nails, a flexible base may help provide a more appropriate foundation. Rubber bases are one category of products designed to combine adhesion with flexibility and additional structure.
For example, Claresa RUBBER BASE 7 is a coloured rubber base intended for nail styling that requires additional structure and flexibility.
Claresa RUBBER BASE 9 offers another shade in the same product family.
A rubber base should not be treated as a universal solution for lifting. Product selection, application thickness, curing and removal must all suit the individual nail and chosen system.
Importantly, some Claresa Rubber Base products are non-soak-off formulas that require filing for removal. Check the individual product instructions before choosing one, especially for home manicures.
What to change: If flexible nails repeatedly cause cracking or lifting, have the nail structure and base selection assessed rather than repeatedly adding thicker layers of hard product.

10. The Natural Nails Are Damaged, Over-Filed or Subjected to Repeated Trauma
A weak, thinning or peeling natural nail plate can make consistent gel adhesion more difficult.
This may occur after aggressive filing, repeated picking, forceful product removal or mechanical damage.
If gel polish is regularly peeled from the nail, the removal can take superficial layers of the natural nail plate with it. That may leave the nail more fragile and less suitable for another immediate application.
The American Academy of Dermatology advises avoiding picking gel polish and allowing damaged nails appropriate time to recover.
In addition, frequent impact, prolonged wet work and using nails as tools can contribute to manicure damage.
What to change: Stop forceful removal, reduce unnecessary abrasion and assess the condition of the nail before reapplying gel. Nails showing persistent splitting, pain, inflammation or separation from the nail bed should be assessed by a qualified healthcare professional.
Why Does Gel Polish Peel Off in One Piece?
When gel polish peels off as an entire sheet, it often indicates a failure of adhesion between layers or between the base coat and the natural nail. The exact location of the separation helps identify which stage needs attention.
If the Base Coat Comes Off with the Colour
If the base, colour and top coat detach together, the initial bond to the natural nail may have failed.
Review the nail preparation, surface contaminants, base coat suitability, any required primer and curing conditions.
A correctly chosen gel base coat is an essential part of a conventional gel polish system. However, even a high-quality base cannot compensate for oil, remaining cuticle tissue or incompatible curing conditions.
If the Base Remains but the Colour Peels Away
If the base is still firmly attached but the colour layer separates, the problem may lie between the base and colour products.
Check product compatibility, whether an intermediate layer was incorrectly wiped or contaminated, and whether each layer was applied and cured according to its instructions.
Some gel bases intentionally leave a tacky dispersion layer. That layer should not automatically be removed unless the manufacturer directs you to do so.
If Only the Top Coat Peels Away
If the colour remains intact and only the final glossy layer separates, focus on the top coat application and compatibility.
Check whether the top coat was intended for the selected gel polish system, whether the colour surface was handled correctly and whether the finishing layer was cured according to its instructions.
Replacing the base coat may not solve a failure that occurs only between the colour and top coat.
Why Is My Gel Polish Peeling After One or Two Days?
Gel polish peeling after 24 or 48 hours is a sign that the manicure should be reviewed rather than accepted as ordinary wear.
The first checks should be:
- Surface preparation: Was the natural nail properly cleaned and prepared before the base coat?
- Skin contact: Did any gel flow onto the cuticle or sidewalls?
- Base coat: Was the correct base used for that nail type and product system?
- Curing: Was every layer cured with a compatible lamp according to its instructions?
- Layer thickness: Was the colour applied too heavily?
- Natural nail condition: Was the nail plate damaged, excessively thin or peeling before application?
If all ten nails peel after a similarly short period, investigate the shared preparation and application process first.
If only one finger repeatedly experiences lifting, examine that nail individually for local damage, contact with the skin during application or repeated mechanical pressure.
The time at which peeling occurs is a useful clue, but it does not prove that any single product caused the failure.
Why Do Gel Nails Keep Lifting at the Cuticles?
Repeated cuticle-area lifting often points towards a local preparation or application issue.
Check whether non-living cuticle tissue remains on the nail plate, whether product has touched the skin and whether the base was applied to a properly prepared surface.
When working near the cuticle, use a controlled amount of product and maintain a clean margin around the nail fold.
Applying extra gel into an existing lifted area is not a reliable repair. If a gap has formed beneath the coating, the separated material must be dealt with appropriately before the manicure is replaced or professionally corrected.
For nail preparation products, explore the Claresa Nail Essentials Collection, including cleaners, dehydrators, primers and manicure tools.


How to Stop Gel Polish from Peeling: Step-by-Step Prevention
A durable gel manicure begins before the colour is applied. Each stage should support the next, from the condition of the natural nail to the final top coat.
Step 1: Assess the Natural Nails
Before applying any product, examine the natural nails for visible damage, splitting, unusual discoloration or signs of separation from the nail bed.
Do not cover a painful, inflamed or potentially infected nail with gel polish. If the natural nail is significantly damaged, another gel application may not be appropriate.
Step 2: Shape the Nails Without Excessive Filing
Choose a practical nail length and shape. Gently refine the free edge without unnecessarily thinning the nail plate.
Follow the preparation requirements for the chosen system rather than using aggressive filing to force better adhesion.
Step 3: Prepare the Cuticle Area Carefully
Remove appropriate surface residue from the nail plate while protecting the living skin around the nail.
The objective is to provide a clean application area, not to remove as much natural material as possible.
Step 4: Clean and Dehydrate When Required
Remove dust with appropriate tools and prepare the nail surface using the cleansing method specified for the chosen products.
Claresa CLEANER PRO can be used for cleaning and degreasing the nail plate.
If your chosen application system requires a dehydrator, Claresa Nail Prep DEHYDRATOR provides an additional preparation option.
After cleaning, avoid touching the nail surface with your fingers, which can transfer oil back onto the prepared area.
Step 5: Apply Primer Only When Appropriate
If an additional adhesion product is recommended, apply it according to the instructions for the exact formula.
For example, Claresa Primer Ultra Tape is intended to leave a tacky layer beneath the base coat, while other preparation products may have different evaporation and application requirements.
Do not assume that using more primer will make a manicure more durable. Excessive product and incorrect combinations can create new application problems.
Step 6: Apply the Correct Base Coat
Choose a compatible base for the natural nails and intended manicure.
Apply the base in the amount recommended by the manufacturer, keeping the product away from the skin and sidewalls.
A classic base is often suitable for a straightforward short-nail gel manicure. Structured and rubber bases have different properties and may require different professional application and removal methods.
Browse the Claresa Base Coat Collection for available base products and their individual application requirements.
Step 7: Apply Colour in Controlled Layers
Use thin, even colour layers according to the product instructions. Cure each required layer with a compatible UV/LED lamp.
Do not try to achieve full opacity by applying an excessively thick single coat.
Pay particular attention to highly pigmented gel colours, and always follow their specified curing requirements.
Step 8: Finish with a Suitable Top Coat
Apply a compatible top coat without flooding the cuticle area. Cover the intended nail surface evenly and follow the manufacturer’s curing instructions.
Claresa Diamond Top No Wipe is a high-gloss finishing product that does not require removal of a dispersion layer after proper curing.
The top coat helps protect the colour, but it cannot restore adhesion beneath an already lifting base coat.
Explore the Claresa Top Coat Collection for other compatible finishes.
Step 9: Protect the Finished Manicure
Once the manicure has been correctly cured, avoid using the nails as tools or repeatedly exposing them to unnecessary impact.
Wear protective gloves for household cleaning and use suitable moisturising products to care for the skin around the nails.
Do not pick at small chips or lifting edges. This can cause the separation to spread and may damage the natural nail.
Dehydrator, Primer, Base Coat and Top Coat: What Does Each Product Do?
These products are not interchangeable. Each performs a different function within the manicure process.
| Product type | Main purpose | When it is used |
|---|---|---|
| Nail cleanser | Removes suitable surface residue and assists with cleaning or degreasing | During preparation and at other stages specified by the product system |
| Dehydrator | Temporarily removes surface moisture and lipids | After nail preparation, before the base or compatible primer where required |
| Primer | Promotes adhesion in systems that call for additional priming | Before the base coat, according to product instructions |
| Classic base coat | Provides the foundational gel layer and promotes adhesion | Before the colour layers |
| Rubber or structured base | Provides additional structural characteristics for suitable nails | As the base or structure within a compatible application system |
| Colour gel polish | Provides the manicure colour and decorative finish | After the appropriate cured base |
| Top coat | Provides the final protective and decorative finish | After the colour or design layers |
Correct product selection is more important than simply increasing the number of layers. A manicure does not automatically become stronger because it includes several primers, multiple bases or additional top coats.
Which Claresa Products Can Help Prevent Gel Polish Lifting?
The most useful products depend on the cause of the lifting. The following options address different stages of preparation and application.
For Surface Preparation: Claresa Cleaner Pro and Nail Prep Dehydrator
Claresa CLEANER PRO 100 ml removes surface residue and helps prepare the nail for the next stage.
Claresa Nail Prep DEHYDRATOR 5 ml is intended to remove moisture and lipids from a previously prepared nail surface.
These products are relevant when poor surface preparation is a suspected contributor to lifting.
For Additional Adhesion: Claresa Primer Ultra Tape
Claresa PRIMER ULTRA TAPE 5 ml is an acid-free adhesion product that leaves a tacky layer before the base is applied.
It may be appropriate where the chosen manicure system calls for additional priming. It does not replace a base coat or correct an incompatible curing lamp.
For Classic Gel Polish: Claresa Base 5 ml
Claresa BASE 5 ml is intended for classic gel polish applications on the natural nail.
It is an appropriate product to consider when a conventional gel manicure needs a compatible foundation.
For Additional Structure: Claresa Ultra Base
Claresa ULTRA BASE 5 ml has a thicker, hardening formulation designed for applications requiring more structure.
It should be selected according to the manufacturer’s directions and the needs of the natural nail rather than simply because ordinary gel polish has lifted.
For Flexible Structural Applications: Claresa Rubber Base
The Claresa Rubber Base Collection includes flexible, structural base products for suitable nail styling applications.
Always check the removal method. Non-soak-off rubber bases require a different approach from traditional soak-off gel polish.
For the Final Finish: Claresa Diamond Top No Wipe
Claresa Diamond Top No Wipe 5 ml provides a glossy finishing layer designed to protect compatible gel nail styling.
It is useful for the final stage of a manicure but should not be applied over an unresolved lifting problem.
For the complete range, browse Claresa Bases and Top Coats and Nail Preparation Essentials.
Can You Fix Gel Polish That Has Already Started Lifting?
Do not simply glue a lifted gel edge back down or seal over a visible pocket of separation. Once adhesion has failed, the detached area needs to be assessed and handled appropriately.
The correct response depends on how much product has lifted, the condition of the natural nail and the type of gel system.
If Only a Small Edge Has Lifted
Do not pick, pull or force the edge away from the nail. Avoid activities that catch the lifted area and increase the separation.
Seek appropriate professional correction or removal, particularly if the lifting is close to the cuticle or sidewall.
If a Large Section Has Separated
A manicure with substantial lifting should be removed or professionally corrected using the proper method for that product system.
Do not apply more gel over the separated area without addressing the failed adhesion and checking the underlying nail.
If There Is Discoloration, Pain or Inflammation
Do not cover the area with fresh gel polish. Unusual green, yellow or dark discoloration, soreness, swelling or separation of the natural nail from the nail bed needs appropriate evaluation.
A visible gap beneath gel does not automatically mean an infection is present, but changes in the underlying nail should not be hidden beneath a new manicure.
How to Remove Peeling Gel Polish Without Damaging Your Nails
The correct removal method depends on whether the applied product is a soak-off gel polish or a non-soak-off structural product.
Do not assume every product labelled gel or rubber base can be removed by soaking.
Removing Soak-Off Gel Polish
For a compatible soak-off system, follow the manufacturer’s removal instructions and use an appropriate remover.
Claresa REMOVER PRO 100 ml is an acetone-based remover intended for gel polish removal.
Where the product is suitable for soaking, acetone-based removal should soften the coating so that it can be removed without forceful scraping or peeling.
The American Academy of Dermatology’s gel polish removal guide provides advice on protecting the surrounding skin and avoiding damage to the natural nails.
Removing Non-Soak-Off Gel Products
Some builder gels, hard gels and rubber bases require filing rather than soaking. These products should be removed according to their specific instructions, preferably by a suitably trained nail professional.
Trying to peel or scrape a non-soak-off enhancement from the natural nail can cause significant damage.
For a broader explanation of application and removal methods, read Gel Polish Guide: How to Apply, Wear and Remove Gel Nail Polish Safely.
Why Does Gel Polish Keep Peeling on Thin or Weak Nails?
Thin, weakened or damaged natural nails may be less suitable for repeated gel applications, particularly when the nail plate has become fragile through incorrect removal or excessive filing.
A structural base is sometimes considered for nails requiring additional support, but this decision should not be automatic.
The nail should first be assessed for visible damage, sensitivity, splitting or abnormal separation.
If the nail is substantially damaged, recovery and appropriate nail care may be more important than immediately applying another gel system.
The purpose of a stronger or more flexible base is to suit a particular nail styling requirement, not to conceal underlying damage.
Does Using a Better UV/LED Lamp Prevent Gel Polish Peeling?
A suitable lamp is important, but purchasing a more powerful lamp does not automatically resolve every lifting problem.
The essential requirement is compatibility between the lamp and the gel products being cured.
A correctly prepared manicure may still fail if the products are not adequately cured. Equally, a compatible lamp cannot compensate for gel polish touching the skin, substantial nail damage or inappropriate base selection.
When investigating a curing problem, check the product instructions, lamp specifications, nail positioning and application thickness.
If you are assembling a complete manicure setup, the Gel Nail Starter Kit with Lamp Guide explains the components of a coordinated gel nail system.
How Long Should Gel Polish Last Without Lifting?
A correctly applied gel polish manicure can often remain attractive for approximately two to three weeks, although actual wear time varies.
Durability depends on the natural nails, preparation, product system, curing, nail length and daily activities.
A manicure that repeatedly lifts after one or two days should be investigated. That short wear time may indicate a problem with the application process, compatibility or natural nail condition.
Even a well-applied manicure is subject to natural nail growth and mechanical wear. It should be maintained and replaced according to the condition of the nails and the product system.
Frequently Asked Questions About Gel Polish Peeling and Lifting
Why is my gel polish peeling off after one day?
Peeling after one day may result from inadequate nail preparation, residue on the nail plate, unsuitable base products, thick colour layers or incomplete curing. Check where the coating separated and whether the base remained on the nail before deciding which part of the application needs attention.
Why does my gel polish peel off in one piece?
When the entire coating peels away in one piece, adhesion may have failed between the natural nail and base coat or between individual gel layers. Preparation, product compatibility and curing should be checked. The shape of the peeled coating alone cannot establish the exact cause.
Why is my gel polish lifting at the cuticles?
Lifting near the cuticle can occur when preparation residue remains on the nail plate or when gel polish touches the surrounding skin during application. Review the cuticle-area preparation and leave a clean margin between the product and skin.
Why do my gel nails lift at the tips?
Tip lifting may be associated with mechanical pressure, nail flexibility, free-edge application or weakened adhesion. Consider the condition of the free edge, the nail length and how much pressure the manicure experiences during everyday activities.
Do I need a dehydrator before gel polish?
A dehydrator may be recommended by certain gel polish systems, particularly when surface moisture or lipids need to be removed before application. It is not a universal requirement for every product. Follow the manufacturer’s preparation instructions.
Does primer stop gel polish lifting?
A suitable primer can support adhesion in systems that require it, but it does not guarantee that gel polish will never lift. Correct preparation, a compatible base, proper application and complete curing remain essential.
Can I apply gel polish without a base coat?
Conventional gel polish systems generally require a compatible base coat unless the manufacturer specifically provides an alternative application method. Skipping the required base can compromise adhesion and the intended product performance.
Is rubber base better for nails that keep lifting?
Rubber base may be appropriate for some nails because of its structural and flexible properties. However, it is not automatically better for every nail type or every lifting problem. The selected product must suit the nail condition and complete manicure system.
Can thick gel polish cause peeling?
Yes. Excessively thick layers can interfere with proper curing and may allow the product to flood the surrounding skin. Use controlled layers and the curing conditions specified for the exact formula.
Why does my gel polish wrinkle under the lamp?
Wrinkling can indicate that the product has not cured appropriately throughout the layer. Excessive thickness or incompatible curing conditions may contribute. Do not cover the wrinkled layer with more gel; review the application and curing instructions.
Why is my gel polish still sticky after curing?
Some gel products intentionally leave a tacky dispersion layer after curing. This is not necessarily a sign of under-curing. However, an unusually soft, wet, wrinkled or improperly cured coating should not be treated as normal. Check the specific product instructions and curing conditions.
Can a weak UV lamp make gel polish peel?
An unsuitable or poorly performing curing lamp can contribute to incomplete curing and manicure failure. Wattage alone is not enough to judge compatibility. Use a lamp that meets the product manufacturer’s curing requirements.
Why does gel polish peel after washing dishes or showering?
Water exposure and everyday hand use may reveal an existing adhesion weakness, particularly around the free edge. Repeated wet work and mechanical pressure can also contribute to manicure wear. If peeling happens consistently, inspect the full application process rather than assuming water alone is responsible.
Can I put top coat over lifting gel polish?
Applying top coat over a lifted area does not restore the failed bond beneath the coating. Avoid sealing over a visible pocket of separation. The affected product should be appropriately assessed, corrected or removed.
Does gel polish damage natural nails?
Gel manicures can contribute to nail problems when products are used incorrectly or removed aggressively. Peeling, scraping and excessive filing can damage the nail plate. Correct product use, suitable removal and appropriate breaks when nails are damaged help protect nail health.
Can I remove peeling gel polish by pulling it off?
No. Pulling or peeling gel polish from the natural nail can remove superficial nail layers and weaken the plate. Use the removal method recommended for the specific product, whether that involves soak-off removal or professional filing.
Where can I buy nail prep products to help with gel lifting in Ireland?
Claresa.ie offers Nail Prep Dehydrator, Primer Ultra Tape, Claresa Base, rubber bases, compatible top coats and nail preparation accessories. Explore the Nail Essentials Collection and Base & Top Collection to compare suitable products for your manicure system.
Keep Your Gel Manicure Looking Its Best
When gel polish starts peeling or lifting, the most useful first step is to identify exactly where the coating has failed. Cuticle lifting, free-edge peeling and colour separating from an intact base can have different causes.
Consistent nail preparation, compatible products, controlled application, correct curing and gentle removal provide the foundation for a durable manicure. Dehydrators, primers and specialist bases can support that process when appropriate, but none of them replaces correct technique or healthy natural nails.
Explore Claresa Nail Essentials for preparation products, Claresa Base Coats for compatible foundations and Claresa Top Coats for the finishing stage of your gel manicure.